How to Acclimate Aquarium Shrimp: A Step-by-Step Guide
To understand how to drip acclimate shrimp, start with what the process does: it gradually mixes receiving-aquarium water into the water holding the shrimp, reducing the abruptness of the final transfer.
That can be useful when suitable source and receiving waters differ. However, a prolonged drip is not automatically appropriate after every shipment. Deteriorating transport water, temperature extremes or marked distress can change the decision.
This shrimp acclimation guide separates arrival assessment from the routine procedure. Prepare the aquarium first, assess the actual arrival, then choose a transition that addresses both water differences and the condition of the shrimp.
Table of Contents
Before the shrimp arrive
Have everything ready before collection or delivery:
- An established receiving aquarium or quarantine system, with functioning filtration, protected intakes and shelter.
- Species-appropriate water, already prepared and checked.
- Testing equipment: a thermometer, pH and ammonia tests, and relevant hardness tests. A conductivity or TDS meter can provide an additional comparison.
- A clean, aquarium-safe container with enough room for added water.
- Airline tubing, a flow-control valve and secure clips.
- A suitable transfer tool, such as a small smooth specimen cup or shrimp net.
- A stable working area, away from sunlight and drafts, with spill protection.
- Time to supervise, plus the supplier’s arrival instructions and contact details.
Introducing shrimp to a new tank means a tank that is new to them—not one that is biologically unprepared. Acclimation cannot compensate for an incomplete cycle or unsuitable water.
Review how to prepare a freshwater shrimp aquarium before arranging livestock delivery.
Decide about quarantine beforehand. Acclimation manages a transition between water conditions; quarantine provides separate housing for observation before animals join an existing collection. Neither substitutes for the other.
Assess the arrival before choosing a method
Start by inspecting the unopened package in subdued light. Confirm the species, journey length, container type and instructions. Look for leaks, dead animals, loss of balance or widespread unusual behavior.
Check the receiving aquarium first so you do not open the transport container and then leave it waiting while preparing equipment.
For a local purchase, obtain the shop’s water readings before leaving. For a shipment, ask about holding-water conditions and any shipping additives before dispatch. Those records help, but transport water may have changed during the journey.
Once ready to act, open the container as required by the selected handling plan and promptly take the useful measurements. Prioritize temperature, pH and ammonia when transport-water deterioration is a concern. Compare hardness and conductivity using advance supplier information and arrival samples where practical.
Never return a sample containing test reagents to the shrimp.
A short journey reduces some transport risks but does not eliminate them. Likewise, a long journey does not prove that the water is dangerous. Packing, animal load, temperature and gas exchange all influence arrival conditions.
Why opening and mixing transport water can matter
In conventional sealed transport bags, respiration can consume oxygen and increase carbon dioxide, while excretion adds ammonia. Dissolved carbon dioxide can lower pH. These transport processes are described in institutional guidance, although fish-specific handling thresholds should not be transferred directly to shrimp.
Ammonia exists as un-ionized ammonia, NH₃, and ionized ammonium, NH₄⁺. A total-ammonia measurement includes both forms; total ammonia nitrogen expresses that combined amount on a nitrogen basis. The more toxic NH₃ fraction increases as pH or temperature rises. Check how your test reports its result.
Opening a bag permits gas exchange. If accumulated carbon dioxide escapes, pH can rise. Adding higher-pH aquarium water can also change the balance. Consequently, dilution does not necessarily produce an immediate reduction in NH₃ exposure.
Opening does not create ammonia, nor does every bag instantly become toxic. The outcome depends on existing ammonia, buffering, temperature and the rate of environmental change.
This is why prolonged warming, aeration or water mixing should not be prescribed automatically for questionable shipping water.
When routine drip acclimation needs reconsideration
| Arrival scenario | Main concern | Information to check | Appropriate next step |
|---|---|---|---|
| Short local journey; shrimp appear stable | Differences between otherwise suitable waters | Temperature, pH, hardness and supplier conditions | A supervised gradual transition may be appropriate; use the routine procedure below |
| Transfer between established aquariums | Assuming two tanks have identical water | Actual readings from both systems | If conditions are already comparable, an extended drip may add little benefit |
| Prolonged shipment without obvious distress | Hidden waste accumulation and changing bag chemistry | Transport time, bag type, ammonia, pH, temperature and additives | Assess before committing to a prolonged drip; use shipment-specific supplier guidance |
| Distress, losses or evidence of degraded water | Continued exposure versus the risk of an abrupt transfer | Receiving-water suitability and the size of the remaining differences | Seek immediate supplier or experienced aquatic-health guidance for a prompt transfer plan |
| Arrival in a gas-permeable bag | Disrupting the bag’s intended gas exchange | Manufacturer and supplier instructions | Do not apply conventional bag-floating instructions automatically |
The distinction between routine mixing and shipped-livestock handling appears in Aquarium Co-Op’s acclimation guidance. Its rapid-transfer advice primarily concerns shipped fish; it is not a universal emergency protocol for freshwater shrimp.
For deteriorated water, the missing information matters: whether the destination is already sufficiently compatible, or whether a separately prepared receiving environment is needed. Arrange that contingency with the supplier before shipping rather than improvising a mineral or pH recipe during a crisis.
Gas-permeable bags require different handling
Gas-permeable bags exchange gases through their walls. Their operation depends on the surrounding environment, unlike a conventional barrier bag with a trapped gas space.
The Shrimp Farm specifically advises against floating breather bags because that interferes with the intended exchange with air. Follow the instructions for the actual bag supplied. A breather bag is not proof that ammonia, temperature or other conditions are suitable.
What the measurements can tell you
Temperature shows the thermal difference. Equalizing temperature does not equalize water chemistry.
pH helps describe the chemical environment and interpret ammonia risk. It can change after sampling as dissolved gases equilibrate.
GH and KH help compare mineral hardness and buffering. They provide information that a single TDS reading cannot replace.
Conductivity and TDS offer a broad comparison of dissolved substances. Many handheld TDS meters estimate TDS from conductivity using a conversion factor. Compare with the same correctly used meter where possible.
Matching TDS does not establish matching composition. Waters containing different proportions of dissolved ions can produce similar overall readings.
Use these measurements together. Do not add minerals or pH adjusters merely to make one display match another.
How to set up drip acclimation
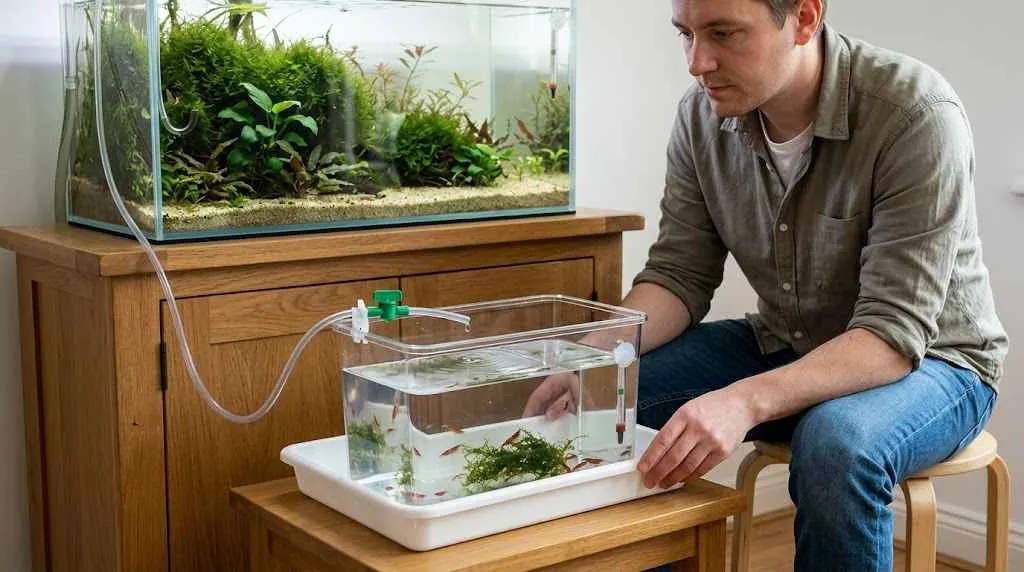
Place the acclimation container securely below the source water level. Use a broad, stable container that keeps the shrimp submerged without concentrating them in a narrow corner.
Secure both tubing ends. Keep the outlet above the acclimation water to reduce the chance of contaminated water returning toward the source. Control flow with a suitable valve.
Prime the tubing by filling it with aquarium water and closing the valve, or use an appropriate siphon starter. Do not start a siphon by mouth. Prefilling the tubing is included in Aquatic Arts’ drip-equipment instructions.
Plan where all added water will go. Use a marked maximum level and a spill tray. A limited, securely positioned reservoir of receiving water can restrict accidental drainage, but it must maintain suitable temperature.
Keep electrical connections clear of spills. Use a ventilated cover where escape is possible, without sealing the container airtight.
An unattended drip is not a controlled procedure.
How to drip acclimate shrimp: the routine procedure
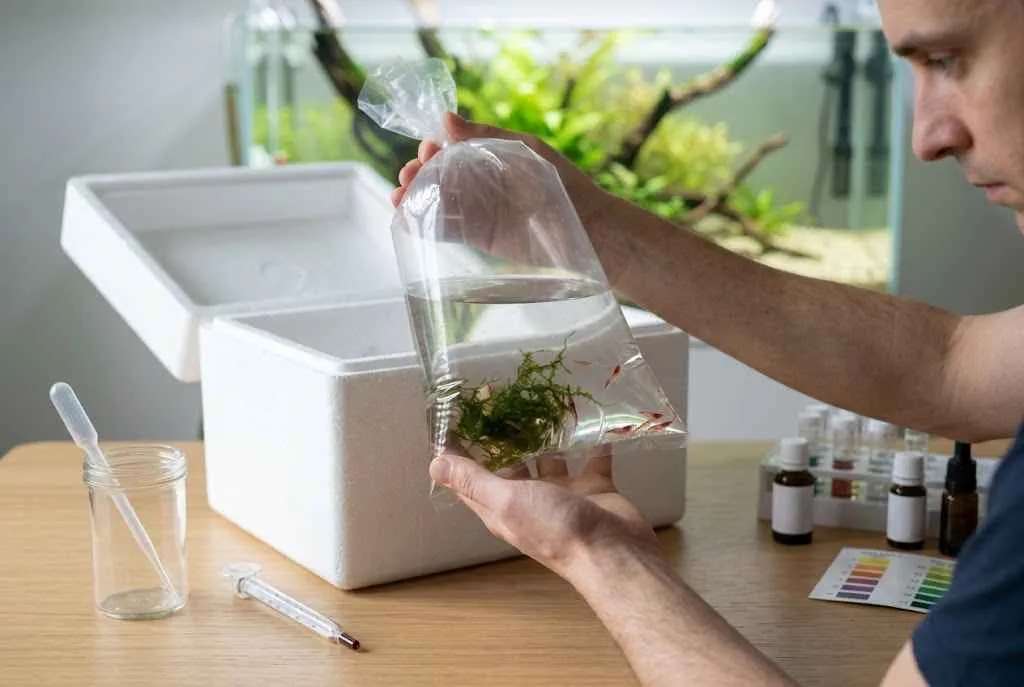
Assumptions: The following procedure is for apparently stable freshwater dwarf shrimp, such as Neocaridina davidi, whose transport water has no identified deterioration requiring a different approach. Both source and destination conditions must be suitable for the species, with differences manageable through a supervised transition.
1. Confirm the receiving aquarium is ready
Check filtration, temperature and current water quality. Confirm that previous preparation established biological waste processing; clear water alone is insufficient.
If quarantine is planned, that prepared aquarium is the destination throughout the procedure.
2. Assess the arrival and select the method
Complete the assessment above before starting a drip.
For a stable arrival in a conventional bag, a supervised sealed-bag temperature adjustment may be appropriate if there is a temperature difference. Stop according to measurements rather than a compulsory floating period.
Do not automatically apply this to gas-permeable bags, extreme temperatures or deteriorated shipments.
3. Move the shrimp into the prepared container
Once the equipment is ready, gently move the shrimp and enough transport water to keep them comfortably submerged into the container.
Support the bag and avoid crushing animals in folds or against packing material. Keep separate arrivals in separate containers rather than mixing waters of uncertain origin.
Record the starting water level and relevant readings.
4. Begin controlled addition of receiving water
Start a steady, adjustable drip into an area away from the animals. Confirm that the water disperses through the container.
Supplier recommendations for drops per second are practical operating suggestions, not universal biological limits. Drop size, initial water volume and water differences all affect the transition. Observe the actual volume being added and the changing readings.
Do not use untreated tap water as the drip source.
5. Monitor the container as well as the shrimp
Watch balance, movement and responsiveness. Recheck temperature and the measurements that initially differed.
A small container can cool even while receiving warmer water. Keep the surroundings thermally stable; where necessary, use a securely supported external water bath with its temperature monitored and no mixing between the bath and acclimation water.
Maintain access to air and suitable oxygenation. For routine water without an ammonia concern, gentle aeration may be appropriate if needed. In questionable shipping water, aeration changes gas balance and is not a substitute for a revised transfer plan.
6. Adjust or abandon the routine plan if conditions change
Correct a displaced tube, unexpected flow or cooling promptly.
If shrimp lose coordination, deteriorate as a group or the water develops an ammonia concern, reassess immediately. Do not simply slow the drip and extend their stay.
The next action must address the actual problem and receiving-water differences. Do not add an ammonia-binding product by an estimated “drop” unless its compatibility, dose and use in that situation have been verified.
7. Decide whether the remaining transfer is appropriate
Completion should mean that the initial temperature and chemistry differences have been substantially reduced, the remaining difference is acceptable for the identified shrimp under the agreed supplier guidance, and container conditions remain suitable.
Compare the container and receiving aquarium again. Stable behavior supports the assessment but cannot prove physiological adjustment.
Neither a doubled volume nor an elapsed hour demonstrates readiness. If a substantial difference remains, seek guidance rather than chasing identical readings indefinitely.
8. Transfer the animals gently
Stop the siphon before handling shrimp.
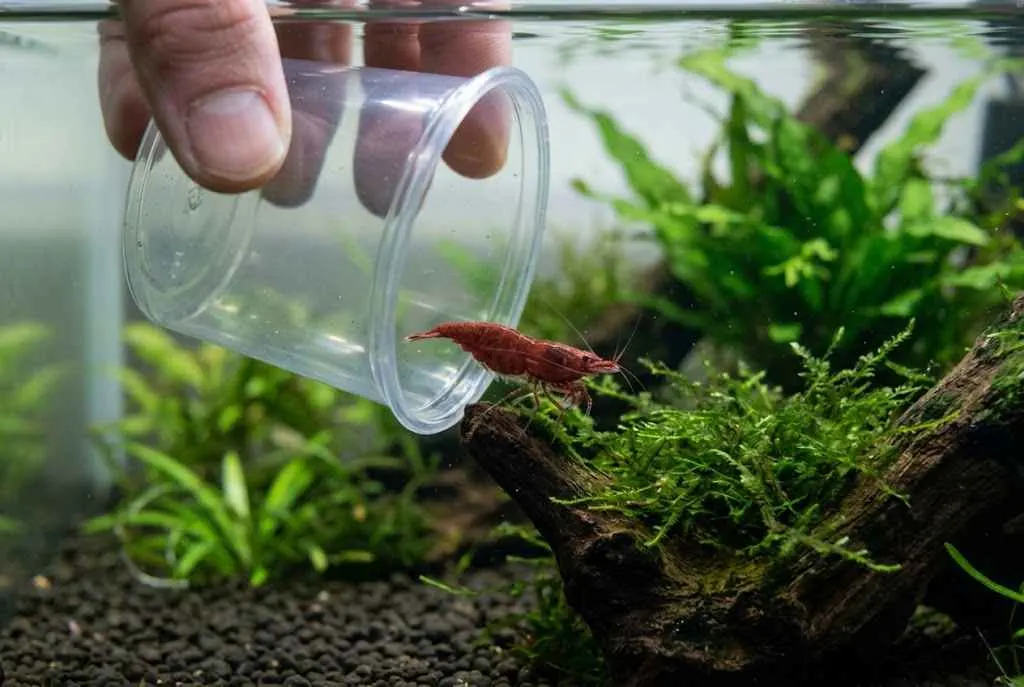
Guide each animal into a smooth specimen cup or suitable shrimp net without pinning it against the container. A water-retaining transfer tool can minimize air exposure, although it carries a small amount of acclimation water.
Lower the tool into the aquarium near shelter and allow the shrimp to leave. Do not shake, squeeze or pour the whole container through a net.
Prioritize gentle handling while minimizing unnecessary transport-water introduction.
9. Dispose of water and clean up
Check the container, tubing and packing material for remaining shrimp before disposal.
Discard transport water through an appropriate household wastewater route, not outdoors or into natural water. Clean and dry equipment, using an appropriate disinfection procedure before sharing it between quarantined and established livestock.
Check that the aquarium’s water level and equipment remain correct.
How long should shrimp acclimation take?
There is no universally established answer to how long to drip acclimate shrimp.
Published supplier schedules vary. They are based on particular handling practices and should not become compulsory shrimp acclimation time targets for every species, bag volume or shipment.
The relevant factors are:
- Starting temperature and chemistry differences.
- Species and life stage.
- Transport-water quality.
- Actual water addition relative to container volume.
- Temperature and oxygen conditions during the process.
- The shrimp’s condition.
This guide does not prescribe a general hourly range because a clock cannot resolve those differences. Finish when the planned transition criteria are met; reassess sooner if the container becomes a worse environment.
Longer is not automatically safer.
Acclimating cherry shrimp
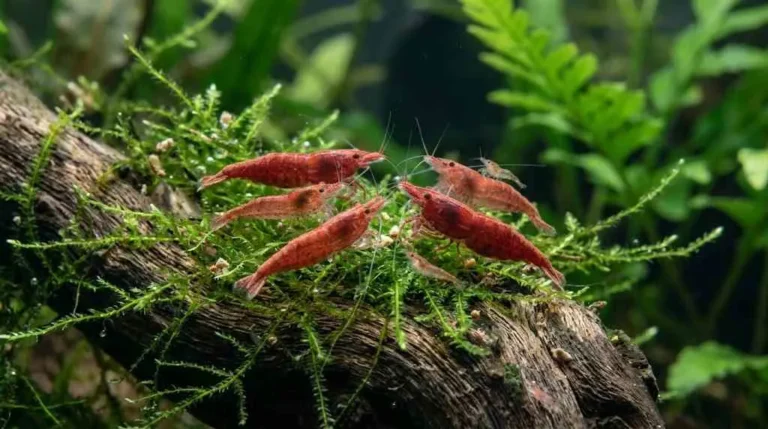
When acclimating cherry shrimp, confirm that the receiving water suits Neocaridina davidi. Their reputation for adaptability does not protect them from degraded transport water or an unprepared aquarium.
Compare temperature and relevant mineral conditions, using pH and ammonia together when interpreting shipping-water risk. If the supplier’s water differs substantially from yours, discuss the transition before purchase.
Use Neocaridina water parameters explained — Neocaridina Water Parameters: GH, KH, pH, TDS and Temperature] for detailed preparation.
For crystal and bee shrimp, consult their specific water-parameter guide — Water Parameters for Crystal and Bee Shrimp]. Those requirements do not describe every species in the genus Caridina.
Monitor after introduction
Keep the surroundings calm and lighting subdued initially. Maintain normal filtration and appropriate surface movement.
Observe the group without repeatedly chasing animals out of shelter. Hiding, brief swimming, grazing or a single molt cannot independently establish success or failure.
Promptly investigate repeated loss of balance, persistent group-wide escape behavior, surface clustering or deaths. Check temperature, ammonia, nitrite and equipment operation, then consider oxygenation, contamination and water differences. Similar warning signs are discussed in Shrimp Up Aquatics’ Amano arrival guide; they are reasons to investigate, not diagnoses.
Avoid heavy feeding, automatic chemical additions or repeating acclimation simply because shrimp hide.
For continuing problems, use a step-by-step investigation of shrimp deaths — Why Are My Shrimp Dying? A Step-by-Step Investigation].
Common mistakes and final checklist
The most consequential mistakes are treating every shipment alike, following a timer despite worsening conditions, matching only TDS, leaving a small container unattended and assuming acclimation replaces aquarium preparation or quarantine.
Before transferring, confirm:
- Readiness: The destination is established and suitable for the species.
- Assessment: Journey, container type and arrival condition have been considered.
- Method: The procedure fits this arrival, including any transport-water concerns.
- Supervision: Flow, water level, temperature and animal condition remain controlled.
- Completion: The remaining transfer is appropriate, rather than merely scheduled.
- Handling: The shrimp can enter gently with minimal unwanted water.
- Follow-up: Equipment checks and observation will continue after introduction.
A useful acclimation procedure responds to the shrimp and water in front of you. Prepare first, make the transition deliberately and change the plan when the evidence calls for it.