Shrimp Tank Water Change: A Stable Maintenance Routine
A good shrimp tank water change routine removes accumulated substances, addresses debris and replaces water without introducing avoidable changes in temperature or chemistry. The right amount and frequency depend on your shrimp, feeding, population, plants and source water.
For an established cherry shrimp aquarium with suitable, consistently prepared replacement water, a weekly partial change of around 25% is one possible starting routine. This is general husbandry guidance, not a scientifically established requirement for every colony. OATA recommends weekly 25% changes in its freshwater shrimp guidance; your measurements and observations should determine whether that approach suits your aquarium.
This guide concerns routine maintenance in an established aquarium. A new tank needs biological preparation first: see how to set up a freshwater shrimp tank.
Table of Contents
Water changes and evaporation top-ups do different jobs
Evaporation removes water while leaving most dissolved mineral salts behind. As the water level falls, those substances become more concentrated. Adding mineral-containing water repeatedly can introduce additional minerals without removing the existing accumulation. The underlying evaporation process is explained by the US Geological Survey.
A top-up restores lost volume. A water change removes aquarium water, including some of its dissolved substances, before replacement.
For a tank maintained using remineralized reverse-osmosis water, replacing evaporation with suitable unmineralized RO water can fit the established preparation plan: the evaporated water did not carry away the minerals. However, water removed during maintenance takes minerals with it, so its replacement usually needs the normal preparation.
Keep these two tasks separate in your records. Indefinite top-ups do not provide the same removal of dissolved material as water replacement.
Choosing water-change frequency and amount
Consider shrimp water change frequency and shrimp water change amount together. A smaller change performed more often is a different routine from a larger change at longer intervals; neither is automatically appropriate.
Start with the species’ requirements and the aquarium’s actual water volume. Substrate, hardscape and the normal fill level reduce the volume below the tank’s nominal capacity.
Then consider what has changed. A growing colony, heavier feeding, additional tankmates or decaying plants can alter maintenance needs. Established filtration processes certain wastes, but its presence does not establish a complete maintenance schedule.
| Observation | What to review | Practical next step |
|---|---|---|
| Nitrate rises consistently between changes | Feeding, population, plant growth and source-water nitrate | Review waste inputs and whether the routine exports enough |
| Conductivity or TDS climbs over successive weeks | Evaporation, top-up water, additives and source water | Investigate the cause rather than choosing a water change from TDS alone |
| Food remains or debris collects around feeding areas | Portion sizes, food access and local circulation | Remove leftovers and adjust feeding |
| Filter output decreases | Intake, sponge, tubing or media blockage | Inspect and clean the affected component |
| The colony grows substantially | Future adult population, feeding and maintenance workload | Reassess the routine before conditions deteriorate |
| Source-water readings change | Supply changes, treatment and preparation method | Verify replacement water before using it |
Plants can take up nitrate, so low nitrate does not prove that every relevant condition is satisfactory. Clear water is equally incomplete evidence. Use several observations alongside appropriate tests.
Choose a routine you can perform consistently. If maintaining suitable conditions repeatedly requires substantial corrective work, review feeding, population, equipment and preparation rather than relying on increasingly demanding maintenance.
Preparing replacement water
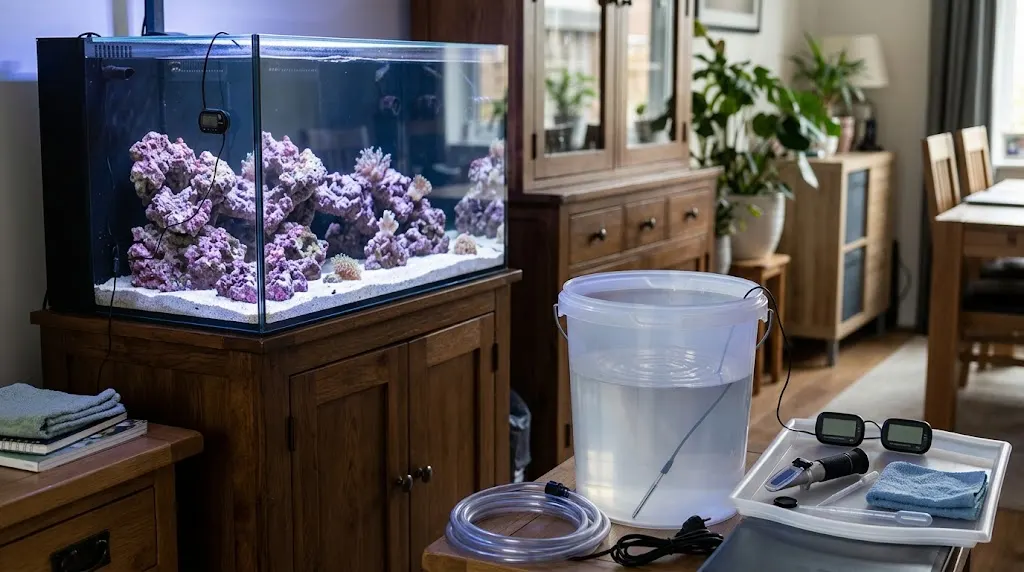
Prepare enough suitable replacement water before removing aquarium water.
1. Identify your source and preparation method
Know whether you use tap water, RO water, distilled water or a measured blend. Check the source periodically, especially after a supply change or an unexplained difference in your usual results.
Use clean, aquarium-dedicated containers. A bucket previously used for household cleaners is unsuitable.
2. Treat disinfectants where necessary
For disinfected tap water, use treatment explicitly suitable for the disinfectant present and follow its instructions.
Do not assume leaving water standing makes it suitable. Chloramine is more persistent than free chlorine and does not rapidly dissipate through standing alone.
Dechlorination does not correct unsuitable hardness or make every tap-water supply appropriate for every shrimp species.
3. Prepare minerals when your established method requires them
Do not use plain RO or distilled water as routine replacement water without considering the resulting mineral balance.
Remineralizers serve different purposes. Some raise both GH and KH; others primarily raise GH. Manufacturer instructions illustrate this distinction, so products and doses cannot be exchanged automatically. Mix and measure according to the selected product’s instructions.
For crystal and bee shrimp, consult their water-preparation requirements — Water Parameters for Crystal and Bee Shrimp]. These requirements should not be extended to every Caridina species.
4. Check the measurements that matter
Matching shrimp tank water means preparing a suitable replacement, with attention to relevant differences—not reproducing unwanted accumulations.
| Measurement | What it helps assess | Important limitation |
|---|---|---|
| Temperature | Whether replacement will cool or warm the aquarium | Suitability depends on the species and amount changed |
| GH | Primarily calcium and magnesium hardness | Does not describe all dissolved substances |
| KH/alkalinity | Acid-buffering capacity in ordinary aquarium testing | Does not independently determine pH |
| pH | Current acidity or alkalinity | Influenced by buffering, dissolved gases and aquarium processes |
| Conductivity/TDS | Changes in dissolved ionic material | Does not identify its composition or prove water safety |
Conductivity depends on both the amount and type of dissolved ions. Therefore, two waters with matching conductivity—or matching readings from a conductivity-based TDS meter—need not have equivalent composition.
Measure temperature rather than judging it by touch. Investigate meaningful chemistry differences, but avoid repeatedly adding chemicals merely to force an identical pH reading.
For test selection and consistent technique, see choosing and interpreting aquarium water tests — Aquarium Water Test Kits: Choosing Tests and Reading Results].
Equipment checklist
Have these ready before starting:
- An aquarium-dedicated replacement-water container and collection bucket.
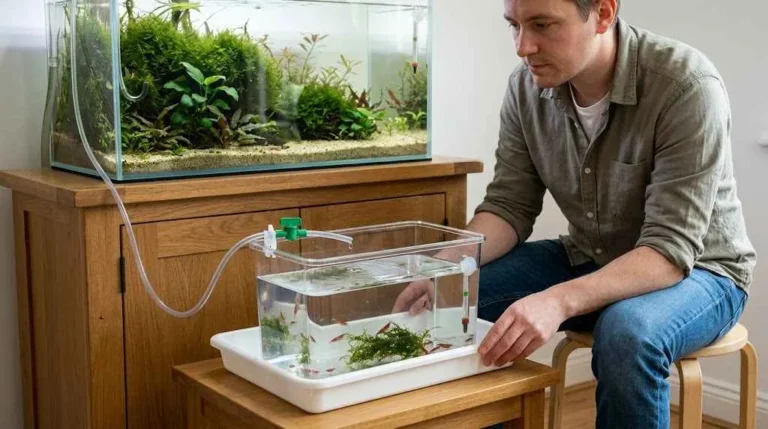
- A suitable siphon or small tubing with controllable flow.
- An intake guard appropriate for the smallest shrimp present.
- Necessary water-treatment supplies.
- A thermometer and relevant water tests.
- A controlled refill arrangement.
- A simple maintenance record.
Check that guards fit securely. Intake protection reduces risk but does not replace watching the siphon or inspecting collected water.
How to do a shrimp tank water change?
1. Observe the aquarium
Check the shrimp, water level, temperature and filter operation. Note unusual activity, unexplained deaths or a possible contamination event.
If something appears wrong, assess it promptly. Routine cleaning should not delay investigation.
2. Prepare and verify the replacement
Complete treatment, mineral preparation where required and relevant checks before draining. Resolve an unexpected replacement-water result first.
Keep prepared water protected from household sprays, cleaners and accidental contamination.
3. Plan the removal
Choose an amount based on your routine and current observations. Use measured container markings rather than estimating solely from the depth of water removed.
Account for evaporation separately so that a low starting water level does not confuse your calculations.
4. Protect electrical equipment
Follow equipment instructions for servicing and changing water levels. Prevent heaters from becoming exposed while operating and pumps or filters from running outside their specified conditions.
Observe any required heater cooling or restart interval. Equipment designs differ, so there is no single shutdown sequence for every aquarium.
5. Remove water carefully
Use an appropriate priming bulb, pump or other manufacturer-approved method to start the siphon; do not start it by mouth.
Secure the outlet in the collection bucket. Watch the aquarium end continuously and keep it away from shrimp, especially juveniles hidden in moss or around feeding areas.
6. Clean selected areas
Remove leftover food, detached decaying leaves and accessible debris where needed. Avoid lifting the entire hardscape or disturbing every planted area during an ordinary change.
Clean enough to address the problem while retaining useful grazing surfaces.
7. Refill under control
Secure the refill tube or pour gently against a suitable diffuser so the incoming water does not scour substrate, dislodge plants or strike shrimp directly.
A routine refill does not automatically require hours of dripping. Choose a method appropriate to the replacement amount, verified water conditions and aquarium layout. Slow delivery cannot make unsuitable water suitable.
Stay present until the refill is complete.
8. Restore and check equipment
Return equipment to operation according to its instructions. Confirm that filters restart correctly, circulation resumes and connections do not leak.
Check the final water level and temperature.
9. Inspect, observe and record
Inspect collected water, removed plant material and serviced equipment for accidentally collected shrimp before disposal. Recover any animals gently using a suitable transfer tool.
Watch the aquarium after maintenance and record the amount changed, preparation method and anything unusual.
How to clean a planted nano shrimp tank
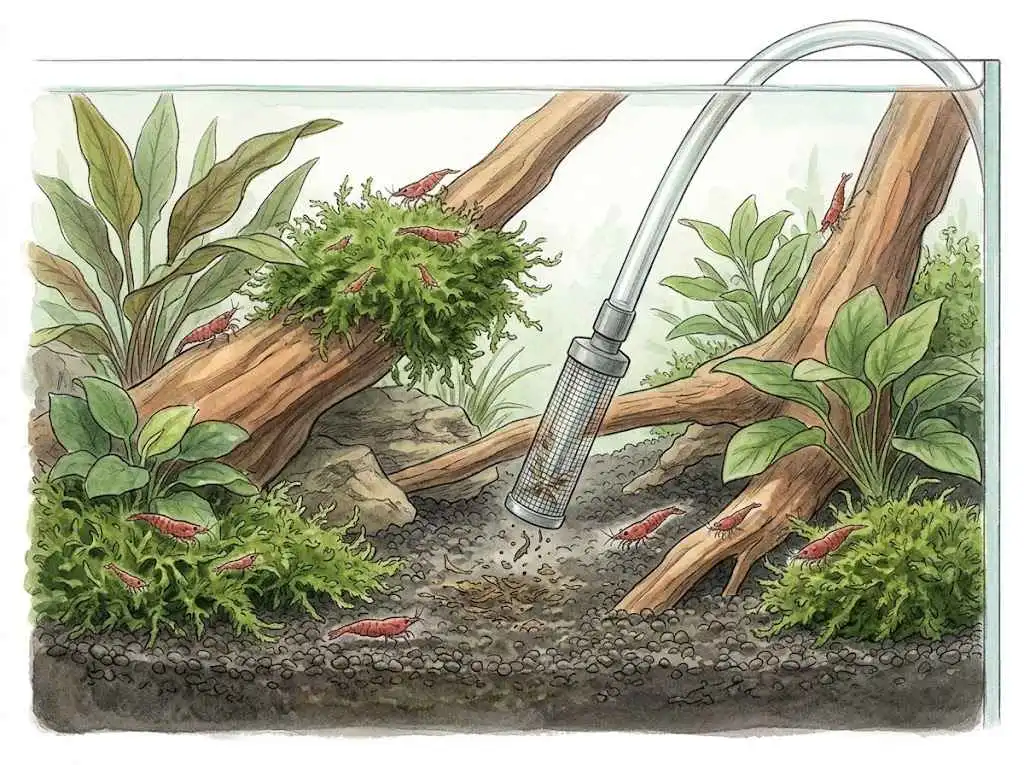
In a small planted aquarium, work around the plants rather than treating the substrate as an empty gravel bed.
Use controlled suction to target loose debris in accessible areas. Check moss, plant trimmings and feeding dishes for shrimplets before removing them. Trim plants when needed to preserve access and circulation, and collect detached material.
Some established surface growth provides grazing opportunities. Scrubbing every pane, stone and plant surface during each change is unnecessary; Dennerle’s maintenance guidance similarly recommends retaining grazing areas and limiting substrate cleaning to areas that need it.
Small volumes make measuring important. An unintended extra bucketful represents a larger fraction of a nano aquarium’s water. That calls for controlled handling, not an assumption that tiny changes will always meet its maintenance needs.
Filter and substrate maintenance
Inspect filter flow and accessible components before deciding what needs cleaning. A blocked intake may need attention even when the biological media does not.
Follow the equipment instructions. For example, Fluval’s FX manual specifies aquarium or dechlorinated water for washing foam and aquarium water for rinsing biological media. These are component-specific instructions, not a reason to wash every filter part identically.
Avoid unnecessary sterilization or wholesale biological-media replacement. Mechanical, biological and chemical media have different functions and maintenance requirements.
Likewise, routine water changes do not require deep disturbance of the entire substrate. Address visible deposits locally and investigate recurring accumulation.
Water changes for cherry shrimp: a worked example
Consider a hypothetical established Neocaridina davidi aquarium with:
- A nominal capacity of 10 US gallons, approximately 38 liters.
- An estimated actual water volume of 30 liters, approximately 7.9 US gallons.
- An established filter, plants and a manageable colony.
- Suitable, consistent source water and no current signs of harmful conditions.
Using the introductory 25% starting routine would mean replacing approximately 7.5 liters, or 2 US gallons, at the weekly maintenance visit.
This is an application of general husbandry guidance, not a demonstrated optimum for this colony. The keeper should review measurements, feeding, debris, reproduction and replacement-water consistency before retaining or changing the routine.
If the prepared water unexpectedly differs from its usual characteristics, investigate before proceeding mechanically with the planned volume.
For the underlying chemistry, see water parameters for cherry shrimp and other Neocaridina — Neocaridina Water Parameters: GH, KH, pH, TDS and Temperature].
Monitoring and adjusting your maintenance schedule
A useful shrimp tank maintenance schedule combines brief daily observation with planned testing and maintenance.
Record:
- Date and volume changed.
- Relevant aquarium and replacement-water measurements.
- Water source and preparation.
- Cleaning performed.
- Changes in feeding or population.
- Notable observations afterward.
Look for repeated patterns. An isolated unexpected reading may justify retesting with correct technique; a consistent trend deserves investigation.
If nitrate rises sooner as feeding increases, review both inputs and water replacement. If conductivity rises while nitrate stays low, investigate evaporation, top-up water and additives rather than assuming the aquarium needs more food removal.
Change the routine for an identified reason and monitor the result.
When routine advice no longer applies
Unexplained deaths, suspected contamination, equipment failure or confirmed harmful water conditions require prompt assessment. Do not wait for the next maintenance day or leave a harmful condition uncorrected simply to avoid change.
Follow the shrimp mortality investigation guide — Why Are My Shrimp Dying? A Step-by-Step Investigation].
A problem noticed after maintenance does not establish its cause. Check replacement-water preparation, equipment, temperature and relevant chemistry before labeling it “osmotic shock,” mineral deficiency or molting failure.
Closing checklist
Before finishing, confirm that:
- Replacement water was treated and prepared appropriately.
- The amount changed reflected actual aquarium conditions.
- Shrimp were protected during removal and refill.
- Cleaning addressed specific needs without stripping the habitat.
- Removed water and materials were checked for shrimp.
- Equipment restarted correctly.
- Relevant observations were recorded.Avoid substituting top-ups for water changes, matching only TDS or applying another keeper’s schedule without its assumptions. Your next maintenance decision should follow what the aquarium shows you: suitable replacement water, manageable waste inputs and a routine that remains effective as the colony changes.